
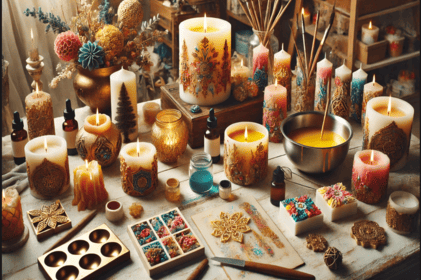
Decorative candles are a perfect way to enhance the ambiance of special occasions like weddings, birthdays, or festive holidays. Making your own decorative candles allows you to customize colors, shapes, and designs to match any theme or style. Here’s a step-by-step guide to crafting beautiful candles that will elevate your celebrations.
Why Make Decorative Candles?
Decorative candles are not only functional but also serve as stunning decor pieces. Handmade candles can be tailored to suit specific events, making them unique and personal. They also make thoughtful gifts and can even be a profitable addition to your craft business.
Materials You’ll Need
Before you begin, gather the following materials:
- Wax: Soy wax, paraffin wax, or beeswax. Soy wax is eco-friendly and holds color well.
- Wicks: Choose a wick suitable for the size of your candle mold.
- Molds: Use molds in various shapes, such as cylinders, hearts, or stars.
- Dyes: Add vibrant colors to match your theme.
- Essential Oils: For scented candles, choose oils like lavender, vanilla, or citrus.
- Decorative Elements: Include dried flowers, glitter, ribbons, or embedded objects.
- Tools: A double boiler for melting wax, thermometer, and a heat-resistant container for pouring.
Step-by-Step Guide
Step 1: Prepare Your Workspace
Set up a clean and organized workspace. Protect surfaces with newspaper or a silicone mat to catch any spills. Gather all your materials and tools to ensure a smooth process.
Step 2: Melt the Wax
Use a double boiler to melt the wax slowly and evenly. Stir occasionally to prevent clumps. Monitor the temperature with a thermometer; the ideal range is typically 170–180°F (77–82°C).
Step 3: Add Color and Scent
Once the wax has melted, add dye chips or liquid dye to achieve your desired color. Stir until fully dissolved. Next, mix in a few drops of essential oil for fragrance. Adjust the intensity based on your preference.
Step 4: Prepare the Mold
Secure the wick in the center of your mold using a wick holder or tape. Ensure it remains straight and upright to avoid uneven burning. If you’re using decorative elements like dried flowers, place them carefully along the sides of the mold.
Step 5: Pour the Wax
Allow the wax to cool slightly to avoid cracking. Pour it slowly into the mold, ensuring the wick stays centered. For layered candles, let each layer set before adding the next color.
Step 6: Decorate and Finish
Once the candle has fully set and cooled, remove it from the mold. Trim the wick to about 1/4 inch (6 mm). Add final decorative touches like tying a ribbon around the base or painting intricate designs on the surface.
Creative Ideas for Decorative Candles
- Holiday Candles: Use red and green for Christmas, or orange and black for Halloween.
- Wedding Candles: Add pearls, lace, or monograms for a sophisticated look.
- Birthday Candles: Create colorful candles with fun shapes like stars or balloons.
- Seasonal Themes: Incorporate dried leaves or flowers for autumn, or shells and sand for summer.
Tips for Success
- Experiment with Designs: Don’t be afraid to try different molds, colors, and decorations.
- Test Scents: Blend essential oils to create unique fragrance combinations.
- Practice Patience: Let candles cool and set completely to ensure a polished finish.
Conclusion: Illuminate Your Special Moments
Creating decorative candles is a rewarding craft that combines creativity with functionality. Whether you’re making them for a party, a gift, or your home, handmade candles bring warmth and beauty to any occasion. Start experimenting today and light up your celebrations with unique, personalized designs.