
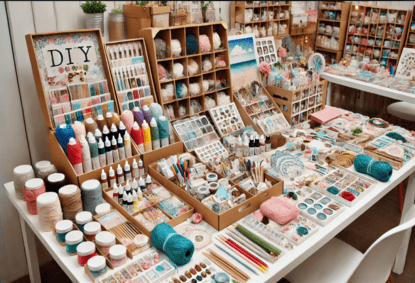
DIY (Do It Yourself) kits have become increasingly popular, offering customers the opportunity to create something unique using provided materials and instructions. These kits are perfect for beginners, craft enthusiasts, or anyone looking for a fun and creative activity. Selling DIY kits can also be a profitable way to grow your craft business. Here’s how to design and sell a successful DIY kit that attracts customers.
1. Define Your Niche
Start by identifying the type of DIY kit you want to create.
- Craft-Specific Kits: Focus on a particular craft, such as jewelry-making, macramé, or candle-making.
- Skill Levels: Decide whether your kits will cater to beginners, intermediates, or advanced crafters.
- Target Audience: Consider who your ideal customers are—kids, adults, or event planners looking for group activities.
Example: A macramé plant hanger kit aimed at beginners could include pre-measured cords, a ring, and a step-by-step guide.
2. Choose High-Quality Materials
The quality of your materials will determine the success of your kit.
- Durable Supplies: Use long-lasting and reliable materials that are easy to work with.
- Eco-Friendly Options: Consider biodegradable or sustainable materials to appeal to environmentally conscious customers.
- Pre-Cut or Pre-Measured: Save your customers time by providing materials that are ready to use.
Tip: Include extra materials in case of mistakes, such as an additional macramé cord or a spare button.
3. Write Clear Instructions
Well-written instructions are key to a successful DIY kit.
- Step-by-Step Guides: Break the process into easy-to-follow steps with clear headings.
- Illustrations or Photos: Include images or diagrams to help visual learners.
- Language Simplicity: Avoid overly technical terms, especially for beginner kits.
- Video Tutorials: Provide a QR code linking to a tutorial video for added guidance.
Example: “Tie a double knot around the wooden ring. Repeat this step until all cords are attached.”
4. Create an Appealing Design
Packaging plays a major role in attracting customers.
- Eco-Friendly Packaging: Use recyclable or reusable boxes, paper, or bags.
- Branded Touch: Add your logo, brand colors, and a thank-you card.
- Organized Layout: Keep materials neatly arranged in separate compartments to avoid confusion.
Tip: Include a preview image on the packaging that shows the final product.
5. Set the Right Price
Pricing your kit appropriately ensures both profitability and affordability.
- Calculate Costs: Factor in materials, packaging, labor, and shipping.
- Research the Market: Compare your kit to similar products to find a competitive price range.
- Offer Tiered Pricing: Create options for different budgets, such as a basic kit and a deluxe kit with extra tools or materials.
Example: A candle-making kit with soy wax and essential oils might cost $30, while a deluxe version with molds and dye options could be priced at $45.
6. Test Your Kit
Before selling, test your DIY kit to ensure it’s user-friendly.
- Assemble the Kit Yourself: Follow your own instructions to verify clarity and completeness.
- Ask for Feedback: Provide the kit to friends or family and ask for their honest opinions.
- Refine as Needed: Make adjustments based on any confusion or difficulties they encounter.
Pro Tip: Test the kit with someone unfamiliar with the craft to simulate a beginner’s experience.
7. Market Your DIY Kit
Promote your DIY kit effectively to reach your target audience.
- Social Media: Share photos and videos of the kit and the finished product on Instagram, Pinterest, and Facebook.
- Influencers: Partner with creators in your niche to showcase your kit to their followers.
- Themed Launches: Tie your kits to holidays or seasons, such as a Christmas ornament DIY kit or a summer bracelet kit.
- Pop-Up Markets: Sell your kits at craft fairs or local events to gain in-person exposure.
Example: Launch a “DIY Valentine’s Day Gift Kit” in February to attract couples and gift-givers.
8. Sell on Multiple Platforms
Expand your reach by selling your kits across different platforms.
- Etsy: List your kits with detailed descriptions and high-quality photos.
- Your Website: Create a dedicated section for DIY kits with customer reviews and FAQs.
- Amazon Handmade: Use this platform to reach a broader audience.
Tip: Offer free shipping or discounts for multiple purchases to encourage larger orders.
9. Offer Add-Ons or Upgrades
Increase your revenue by providing additional options for customers.
- Tool Add-Ons: Sell tools like scissors, needles, or measuring tapes as extras.
- Refill Packs: Offer refill materials so customers can recreate the project.
- Personalization: Allow customers to choose colors, sizes, or patterns.
Example: If you sell a jewelry-making kit, offer extra beads or charms as add-ons.
10. Collect Customer Feedback
Improving your DIY kits ensures long-term success.
- Request Reviews: Encourage customers to leave feedback about their experience.
- Social Proof: Share positive reviews on your website and social media.
- Refine Your Product: Use constructive criticism to update materials, instructions, or packaging.
Pro Tip: Create a survey with a discount incentive to gather detailed feedback.
Conclusion: Inspire Creativity with DIY Kits
DIY kits are a fantastic way to combine creativity with convenience, making crafting accessible to everyone. By providing high-quality materials, clear instructions, and engaging designs, you can create kits that customers love and recommend. Start designing your DIY kit today and watch your craft business flourish!