
High-quality photos are essential for selling handmade crafts online. Great images highlight product details, convey professionalism, and attract more customers. If you want to improve your photography skills and increase your sales, follow this complete guide to photographing your crafts in the best possible way.
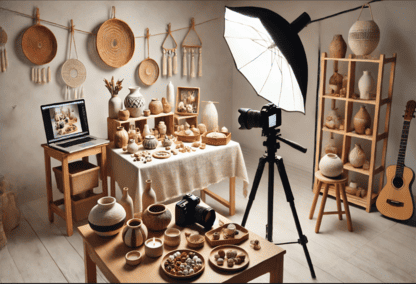
1. Use the Right Equipment
You don’t need an expensive camera to take great product photos, but using the right tools can make a big difference.
- Camera or Smartphone: Modern smartphones have high-resolution cameras that work well for craft photography. If you have a DSLR or mirrorless camera, even better.
- Tripod: Prevents shaky images and helps maintain consistency in angles and composition.
- Lighting Setup: Natural light is ideal, but if unavailable, use a ring light, softbox, or LED lamps.
- Backdrop: A clean, neutral background (like white, beige, or light gray) keeps the focus on your craft.
Tip: If using a smartphone, enable “Pro Mode” or manual settings for better control over lighting and focus.
2. Choose the Best Lighting
Lighting is the most important factor in photography. The right lighting enhances colors, textures, and details in your crafts.
- Natural Light: Photograph near a window with diffused daylight for soft and even lighting.
- Artificial Light: Use softbox lights or LED lamps to create a professional setup.
- Avoid Harsh Shadows: If the light is too strong, use a white cloth or paper to diffuse it.
- Consistent Lighting: Keep lighting conditions the same across all photos to maintain a uniform brand aesthetic.
Tip: The best time to shoot with natural light is during the morning or late afternoon when the sunlight is soft.
3. Set Up a Professional Background
The background should complement your craft without distracting from it.
- Plain Backgrounds: White, gray, or beige backgrounds work best for most crafts.
- Textured Surfaces: Wooden, fabric, or marble textures add depth but should not overpower the product.
- Contextual Backgrounds: Lifestyle shots where the craft is used in a real setting (e.g., a handmade mug on a coffee table) help customers visualize its use.
Example: If you sell handmade jewelry, place the item on a neutral surface or use a simple fabric backdrop to highlight its details.
4. Capture Multiple Angles
Showcase all aspects of your product to give buyers a complete view.
- Front View: Clearly display the main features.
- Side and Back Views: Show dimensions, depth, and any hidden details.
- Close-Up Shots: Highlight textures, engravings, or unique elements.
- Lifestyle Shots: Demonstrate how the product is used in real life.
Tip: Upload at least 5-7 images per product listing to provide a full perspective.
5. Maintain Consistent Composition
A well-composed photo makes your products look more professional.
- Rule of Thirds: Position your craft slightly off-center for a visually appealing balance.
- Even Spacing: Ensure the product is well-framed with enough negative space.
- Symmetry and Alignment: Keep items straight and aligned for a polished look.
Example: If photographing candles, align them in a visually pleasing way rather than placing them randomly.
6. Edit Your Photos for a Polished Look
Basic photo editing can significantly enhance your images.
- Brightness and Contrast: Adjust lighting to make colors pop.
- White Balance: Correct color temperature to ensure accuracy.
- Crop and Straighten: Remove unwanted elements and maintain clean framing.
- Sharpen Details: Enhance texture clarity without over-editing.
Recommended Free Editing Tools:
- Canva – Great for quick adjustments and adding branding elements.
- Snapseed – Ideal for precise color and exposure corrections.
- Lightroom Mobile – Offers advanced editing options.
7. Optimize Images for Online Stores
Large images slow down website loading times, while low-quality images appear blurry.
- Resize for Web: Keep images under 2000px on the longest side for quick loading.
- Use JPEG or PNG Formats: JPEG is best for e-commerce as it balances quality and file size.
- Maintain High Resolution: Avoid pixelation by exporting images at high quality.
Tip: Use online tools like TinyPNG to compress images without losing quality.
8. Brand Your Photos
Adding subtle branding helps create recognition and consistency.
- Watermarks: Place a small, semi-transparent logo in a corner.
- Consistent Style: Maintain the same lighting, backgrounds, and editing style across all product photos.
- Unique Props: Use branded packaging or signature colors to reinforce your brand identity.
Example: A craft business selling handmade soaps might use a signature ribbon or stamp in all product images.
9. Showcase Product Size and Scale
Customers need to understand the actual size of your craft.
- Use Common Objects: Place a coin, ruler, or hand next to the product for reference.
- Include Measurements in Description: Clearly state dimensions in product listings.
Tip: Avoid customer dissatisfaction by ensuring your images accurately represent the product size.
10. Test and Improve Your Photography
Continuously improving your product photography can lead to better sales.
- Compare Different Setups: Experiment with lighting, backgrounds, and angles to see what works best.
- A/B Testing: Use different photos in your listings and analyze which ones perform better.
- Ask for Feedback: Show your images to friends or customers for honest opinions.
Example: If lifestyle photos receive more engagement than plain background shots, incorporate more of them into your listings.
Conclusion: Elevate Your Craft Business with Professional Photography
High-quality product photography can significantly impact your craft business’s success. By using the right lighting, backgrounds, and editing techniques, you can create stunning images that attract customers and increase sales. Start applying these tips today and watch your craft business flourish!