
Making scented candles at home is a rewarding and creative hobby that allows you to customize the fragrance, design, and style to your liking. Whether you want to create a cozy atmosphere or give a thoughtful handmade gift, this step-by-step guide will help you make beautiful scented candles with ease.
Why Make Your Own Scented Candles?
Homemade candles are free from synthetic chemicals and allow you to use natural, eco-friendly ingredients. Additionally, crafting your own candles can save money and offer a therapeutic, relaxing experience. It’s also an excellent way to repurpose containers or start a small business.
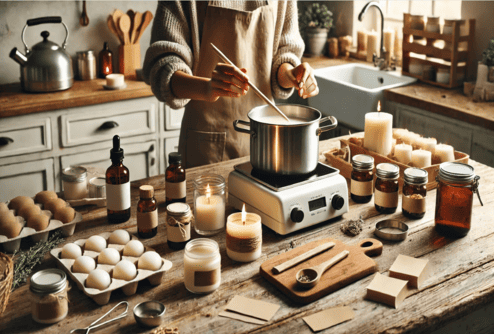
Materials You’ll Need
To get started, gather these essential materials:
- Wax: Soy wax, beeswax, or paraffin wax. Soy wax is eco-friendly and easy to work with.
- Wicks: Choose a wick suitable for the size of your container. Cotton and wooden wicks are great options.
- Containers: Glass jars, ceramic cups, or tins work well for holding candles.
- Essential Oils: For fragrance, such as lavender, vanilla, or eucalyptus.
- Color Dyes (Optional): To add color to your candles.
- Double Boiler or Heat-Safe Bowl: For melting wax.
- Thermometer: To ensure the wax is at the right temperature.
- Glue or Wick Stickers: To secure the wick to the container’s base.
- Mixing Sticks: Wooden sticks or chopsticks for stirring the wax.
Step-by-Step Instructions
Step 1: Prepare Your Workspace and Containers
Clean your containers thoroughly and dry them completely. Attach the wick to the bottom center of each container using glue or wick stickers. Use a wick holder or chopsticks to keep the wick upright and centered while pouring the wax.
Step 2: Melt the Wax
Use a double boiler or heat-safe bowl over a pot of simmering water to melt the wax. Stir occasionally with a wooden stick or spoon until it’s completely liquefied. Avoid overheating the wax, as it may affect its quality.
Step 3: Add Fragrance and Color
Once the wax reaches about 180°F (82°C), remove it from the heat. Add a few drops of essential oil for fragrance, adjusting the amount based on the desired intensity. If using color dye, add it at this stage and mix thoroughly until fully blended.
Step 4: Pour the Wax into Containers
Allow the wax to cool slightly to around 130°F (54°C) before pouring it into the prepared containers. Pour slowly and steadily to prevent air bubbles. Leave a small amount of space at the top of the container.
Step 5: Let the Candles Set
Allow the candles to cool and solidify at room temperature for several hours. Avoid moving the containers during this time to ensure a smooth, even surface.
Step 6: Trim the Wick
Once the candles have fully set, trim the wick to about 1/4 inch (6mm) to prevent excessive smoke or a large flame when burning.
Tips for Success
- Use high-quality essential oils for a longer-lasting fragrance.
- Experiment with layering colors or mixing different scents for unique combinations.
- Repurpose old jars or tins to make eco-friendly containers.
Creating scented candles at home is not only enjoyable but also an opportunity to add a personal touch to your space or gifts. With practice, you can refine your techniques and experiment with new designs and scents. Happy crafting!