
Personalized home decor adds a unique and meaningful touch to any space, reflecting your personality and style. Crafting your own decor allows you to create items that perfectly match your home while giving you a sense of pride and accomplishment. Here’s a step-by-step guide to help you design and create beautiful, customized home decor.
Why Personalize Your Home Decor?
Personalized home decor goes beyond aesthetics. It creates a warm and inviting atmosphere, makes your space truly yours, and can even become a conversation starter when guests visit. Additionally, crafting your own pieces allows you to repurpose materials, save money, and reduce waste by creating something both beautiful and functional.
Materials You’ll Need
Before you begin, gather essential crafting tools and materials. These will depend on your project, but here are some common supplies:
- Paints and Brushes: Acrylic or chalk paints for furniture and wall art.
- Wood and Tools: For creating signs or customized shelves.
- Fabric: Ideal for cushions, curtains, or wall hangings.
- Adhesives: Hot glue, wood glue, or fabric glue, depending on your project.
- Embellishments: Beads, ribbons, stencils, or decals for decoration.
- Measuring Tools: A tape measure, ruler, or level for precise designs.
Step-by-Step Instructions
Step 1: Plan Your Project
Begin by visualizing your idea. Decide on the type of decor you want to make, such as wall art, a centerpiece, or furniture upgrades. Sketch your design or gather inspiration from online platforms like Pinterest.
Step 2: Choose a Color Scheme
Select colors that complement your existing decor. Neutral tones create a classic look, while bold hues add vibrancy. Consider using complementary or analogous colors to ensure harmony.
Step 3: Prep Your Workspace
Organize your materials and set up a clean, well-lit area to work. Protect surfaces with newspapers or a crafting mat to avoid stains or damage.
Step 4: Create Your Base
If you’re working with wood, sand the surface to remove imperfections before painting or staining. For fabric projects, prewash the material to prevent shrinkage later.
Step 5: Add Personal Touches
Incorporate custom elements like:
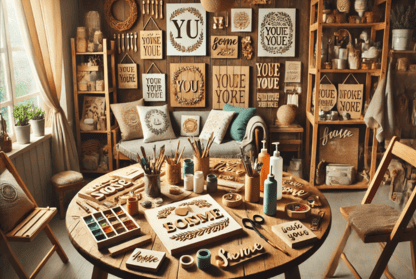
- Names or Initials: Use stencils or freehand painting to add family names or monograms.
- Quotes or Words: Add inspirational sayings or personal mottos to signs or wall art.
- Photos or Prints: Incorporate cherished memories using decoupage techniques or photo frames.
Step 6: Assemble and Secure
Follow your project’s assembly instructions, ensuring all pieces are firmly attached. Use clamps or weights if needed to hold items in place while glue or paint dries.
Step 7: Final Touches
Once your project is complete, add protective finishes like varnish for wood, or sealants for painted items. These finishes enhance durability and give your decor a polished look.
Creative Ideas for Personalized Home Decor
- Customized Wooden Signs: Craft a rustic sign with your favorite quote or family name.
- Decorative Trays: Paint or decoupage a serving tray for a functional yet stylish accent.
- Throw Pillows: Use iron-on transfers or embroidery to personalize pillow covers.
- Photo Collage Frames: Design a unique frame that showcases your favorite memories.
- DIY Wall Murals: Create a feature wall with stencils or freehand art.
Tips for Success
- Start Small: Begin with simple projects to build your confidence and skills.
- Test Materials: Practice techniques on scrap materials before working on the final piece.
- Be Patient: Allow time for paint, glue, or finishes to dry completely before assembling.
- Experiment: Don’t be afraid to mix styles, colors, and textures for a unique design.
Conclusion: Make Your Space Truly Yours
Crafting personalized home decor is a rewarding way to transform your living space into a reflection of your style and creativity. Whether it’s a small accessory or a bold statement piece, each item you make adds a touch of individuality to your home. So grab your tools, let your imagination run wild, and start creating today!