
Macramé is a beautiful and versatile art form that involves knotting cords to create decorative and functional pieces. From wall hangings to plant holders, macramé projects are perfect for adding a handmade touch to your home. This guide will walk you through the basics of macramé and how to start your first project.
What is Macramé?
Macramé is an ancient crafting technique that uses knots to create patterns and designs. Unlike weaving or knitting, macramé doesn’t require special tools, making it an accessible craft for beginners. All you need is some cord and a little patience to get started.
You might also like: Stylish Crafts: Sophisticated Ideas to Make Your Home Truly Unique
Materials You’ll Need
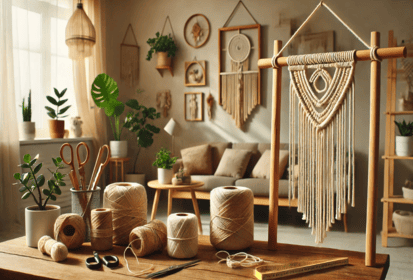
To begin your macramé journey, gather the following items:
- Macramé Cord: Choose cotton cord for its softness and ease of use. Start with 3-5 mm thickness for beginners.
- Support Rod: A wooden dowel, metal ring, or branch to anchor your project.
- Scissors: Sharp scissors to cut cords cleanly.
- Tape Measure: For precise cord measurements.
- Optional: Beads or embellishments to add flair to your design.
Basic Macramé Knots
Learning a few fundamental knots will give you the foundation to create most macramé projects. Practice these before starting a larger piece:
- Lark’s Head Knot: Used to attach cords to a support rod. Fold the cord in half, loop it over the rod, and pull the ends through the loop.
- Square Knot: A versatile knot made by crossing cords over each other.
- Half Hitch Knot: Creates spiral patterns by repeatedly looping the cord in the same direction.
- Double Half Hitch Knot: A more secure version of the half hitch, perfect for intricate patterns.
Step-by-Step Macramé Wall Hanging
Step 1: Prepare Your Workspace
Set up your support rod at eye level using hooks or a sturdy surface. Cut your macramé cord into equal lengths, ensuring you have enough for knotting and fringe.
Step 2: Attach Cords to the Rod
Use the lark’s head knot to secure each cord to the support rod. Space the cords evenly for a balanced design.
Step 3: Create a Base Pattern
Start with a row of square knots. Group cords in sets of four, and work across the row. For added dimension, alternate the starting cords in the next row.
Step 4: Add Decorative Knots
Incorporate half hitch or double half hitch knots to create diagonal lines or spiral patterns. Experiment with spacing and knot combinations to customize your design.
Step 5: Finish and Trim
Once your desired length is reached, tie off the cords with a secure knot. Trim the ends to create a neat fringe or shape them into angles for a modern look.
You might also like: Stylish Crafts: Sophisticated Ideas to Make Your Home Truly Unique
Tips for Beginners
- Practice Makes Perfect: Start with small projects like keychains or coasters to build your confidence.
- Experiment with Materials: Try different cord colors and textures for variety.
- Watch Tutorials: Visual aids can help you master knotting techniques faster.
- Stay Organized: Keep your cords untangled and workspace tidy for smoother progress.
Popular Macramé Projects
Once you’ve mastered the basics, explore these ideas to expand your skills:
- Plant Hangers: A functional way to display indoor plants.
- Dreamcatchers: Add beads and feathers for a boho look.
- Pillow Covers: Knot patterns onto fabric for decorative cushions.
- Curtains: Create an airy and artistic window treatment.
The Joy of Macramé
Macramé is not only a creative outlet but also a relaxing and meditative activity. As you progress, you’ll find satisfaction in transforming simple cords into intricate designs. Whether you’re decorating your home or making gifts, macramé offers endless possibilities for self-expression.